You can fully tailor your printed menu before exporting it. Here's how:
1. Click on the Print Menu icon (top right).

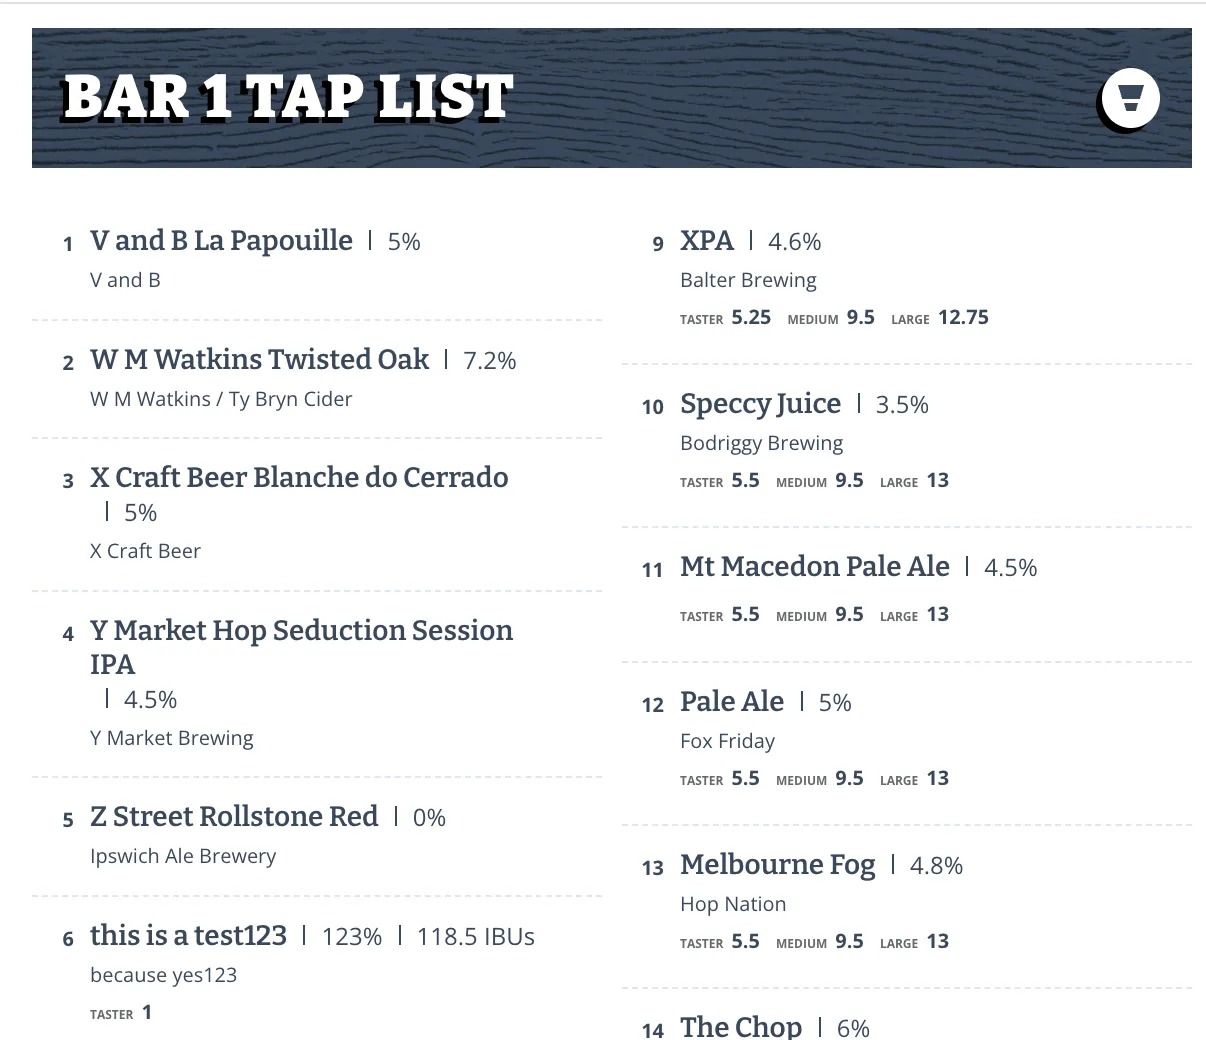
2. Choose a Template
Start by selecting one of the three available menu styles:
- Default
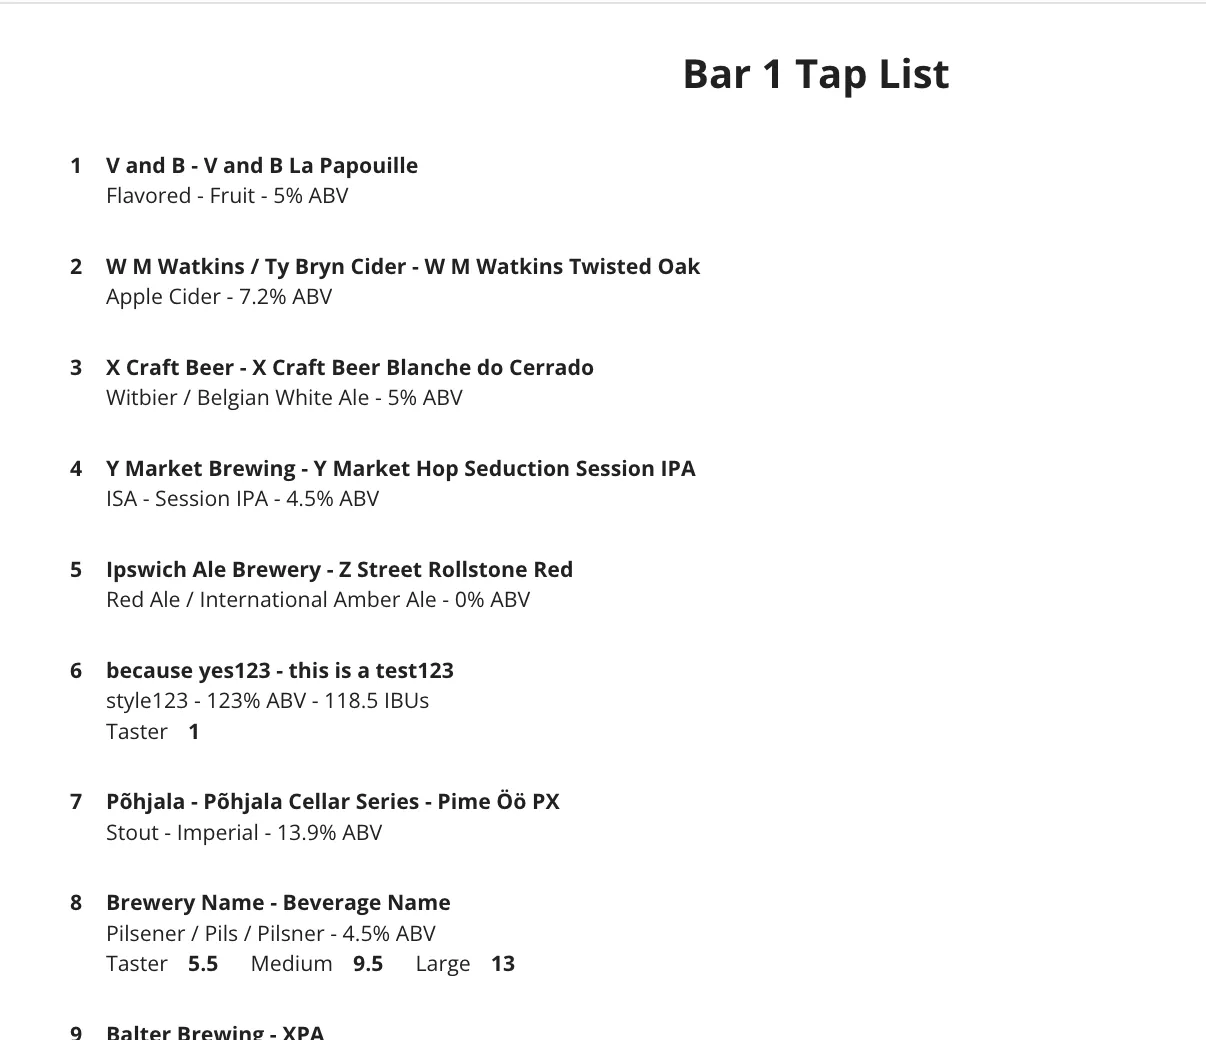
- Classic

- Vertical
3. Fill in the Basics
In the Basics section: set your menu title, choose how to group your taps (by category, brewery, or style), select a column layout (1, 2, or 3 columns), choose how to sort taps within each group (Tap handle number, Beverage ABV, Style, Category, Brewery name, Beverage name).
4. Tap List Settings
In the Tap List section, specify the tap number range you want to display on your printed menu.
5. Sort Groups (if applicable)
If you grouped your taps, go to the Sort Groups section to manually reorder the groupings.
6. Customize the Style
- Adjust the primary, secondary, and dash colors.
- In the Header section, you can:
- Add a logo
- Choose alignment (left, center)
7. Adjust Display Options
In the Options section, choose what information to show or hide on the menu. Check a box to show it, uncheck it to hide it.
8. Footer Customization
- Upload a footer image (optional)
- Add custom footer text if you'd like